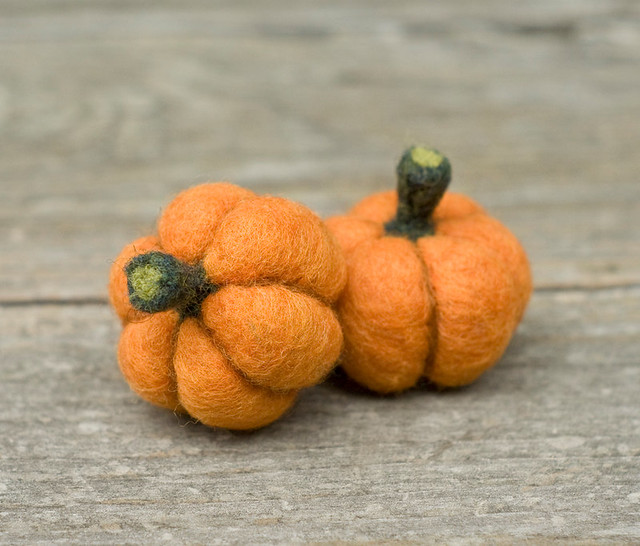
With autumn right around the corner, I thought it would be fun to share a quick and easy project.
Materials
Feltable wool – orange, dark orange, light green and dark green (There are a lot of wool options out there for felting. I find the best type of wool for felting has been carded, but NOT combed. It is sometimes sold in a batt).
You will also need a felting needle (I prefer to use a coarse needle for shaping and a fine needle for details).
Optional: Felting pad (this may make some of the detail work easier, and save your fingers from possible pokes)
General Needle Felting Tips
There is no right way to needle felt. The technique is fairly straightforward. Take a barbed needle to some wool and it will start to become more compact. The more poking you do in one area, the denser the wool will become. Soon and object will start to take shape.
I usually shape with my hands before felting. If the object you are making is round, start with a roundish shape of wool— one that’s been pulled together tightly. (If you start out with a loose “cloud” of wool, it might take awhile before you start to get the wool to felt together.)
Layering the wool will help you build up a form that is also firm and compact. The end result will hold its shape better and be easier to add details to.
Step-by-step Instructions
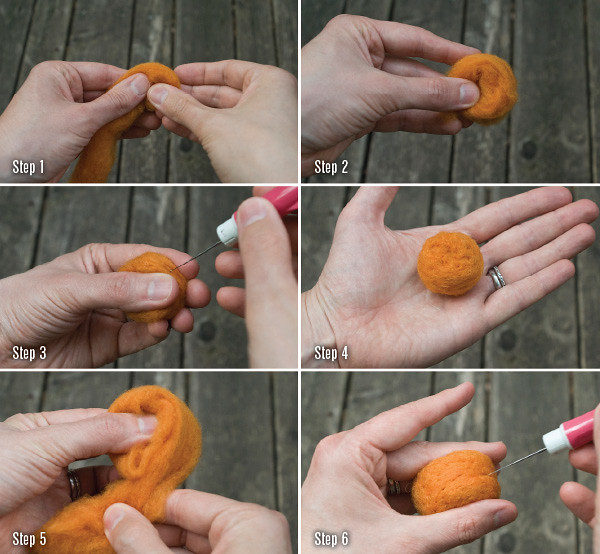
1. Start by rolling up a small piece of orange wool.
2. Try to keep the roll together.
3. With a coarse needle, start felting around the entire shape, making sure to poke in any loose pieces.
4. You should end up with a small, flattened ball.
5. With another piece of orange wool, wrap the felted ball (from steps 1-4), in the same manner as before, making sure to hold it together.
6. With a coarse needle, felt around the entire shape, making sure to poke in any loose pieces.
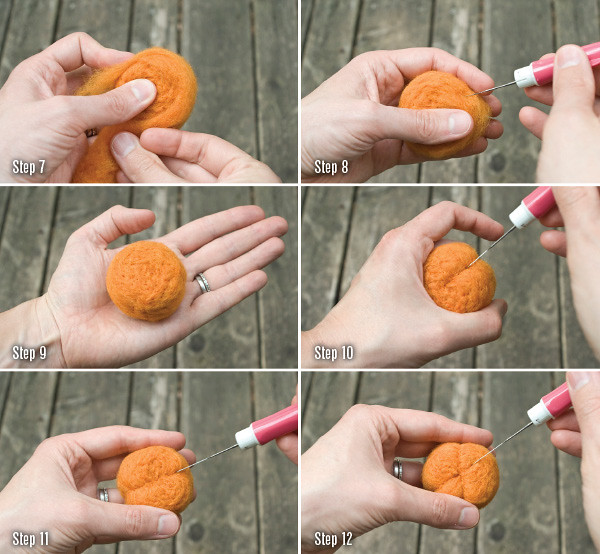
7. With another piece of orange wool, wrap the felted ball (from steps 5-6), in the same manner as before, making sure to hold it together.
8. With a coarse needle, felt around the entire shape, making sure to poke in any loose pieces.
9. Shape as necessary so as to resemble a slightly flattened ball
10. Using the coarse needle and starting at the top center, needle felt a ridge down one side to the bottom center.
11. Turn pumpkin around and repeat.
12. Turn pumpkin and repeat as necessary for desired number of ridges.
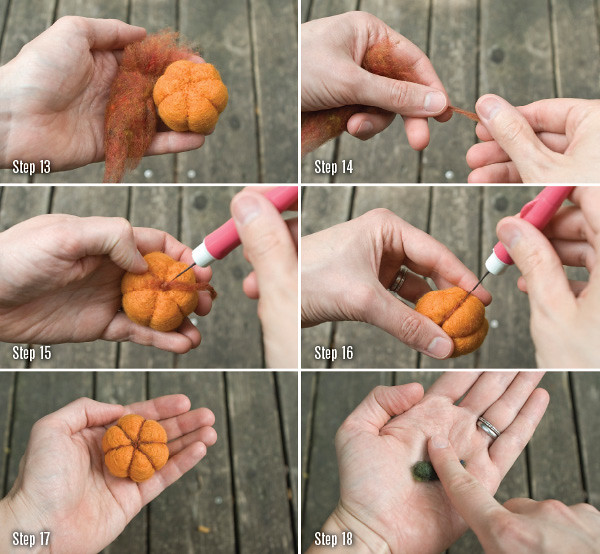
13. Take a small amount of the dark orange wool.
14. Pull and twist a small bit of wool. This will be used to emphasize the ridges. Make a piece that is slightly longer than pumpkin circumference.
15. Starting at the top center, poke one end of the twisted wool and start working your way down one side, felting it into the ridge.
16. Fill in all the ridges, starting at top and working all the way around.
17. See the pumpkin taking shape?
18. Take a small piece of dark green wool, and with a dampened finger, roll back and forth, favoring one end to make a conical shape.
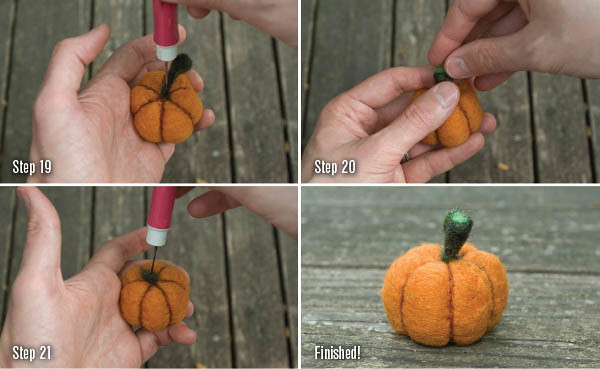
19. Work the thinner end of the stem into the top of the pumpkin, poking until it is very secure.
20. With a very small piece of light green wool, carefully flatten the top of the stem, while shaping and working in the light green piece.
21. With a very small piece of dark green, work a small piece into the bottom of the pumpkin, covering up center with a small circle of dark green.
Finished! That wasn’t so bad, was it? Time to make another! Or, if you want someone else to make one for you, you can order one or more from my shop.
